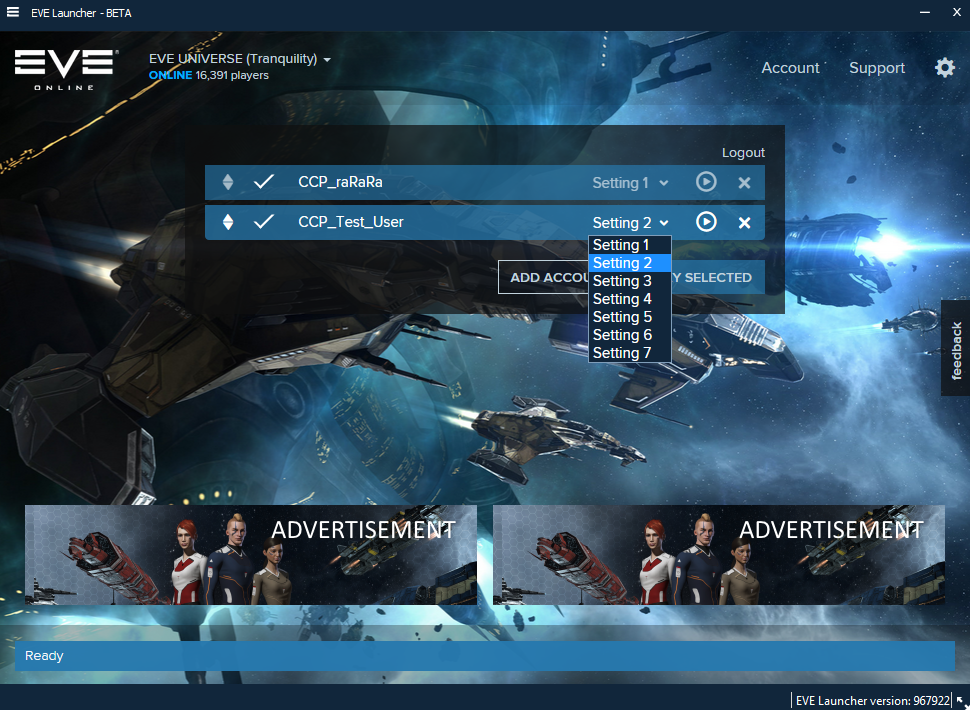
CCP Snorlax announced the release of a beta version of the Eve Online launcher which simplifies running multiple accounts. With this new launcher you can login a set of characters—on separate accounts—simultaneously and easily switch between client configurations. The launcher will also let you select the live or test server, which eliminates the need to maintain multiple installs of Eve Online.
The last update to CCP’s patching technology brought download on demand to the game client. This update to the launcher leverages that technology to allow you to easily switch between the Tranquility server and the Singularity and Duality test servers. Many of the game assets are the same for the different versions of the client used by these servers, so this change will free up a lot of space on your hard drive.
The Eve Online client stores the settings for all your characters in a single folder—typically %LOCALAPPDATA%\CCP\EVE\c_games_eve_tranquility\settings. These setting files save the position of your in-game windows, chat channels, overview settings, graphics settings, and more. The new launcher lets you define multiple settings for each character and it tells the game client which one to use when launched. With this change you can have a different client setup for each game session, which could be useful if you perform multiple roles with a single character.
If you often run multiple game clients, the new launcher has a few features to make this easier. You can select multiple accounts and launch a client for each with a single click. You can toggle focus of a running client and even shutdown clients directly from the launcher. It is smart enough to detect when the character is already logged in and it won’t accidentally log out that session when you click the “Play Selected” button.
You can download the launcher and experiment with it right now. Take note that this new launcher won’t migrate your character settings automatically. The new launcher stores your settings in %LOCALAPPDATA%\CCP\EVE\c_programdata_ccp_eve_sharedcache_tq_* under folders named settings, settings_2, etc. You can migrate your previous settings manually by copying them into these locations.


